 Reconeyez time-lapse allows to create and share stunning time-lapse videos of your construction sites, real estate developments, or any project that requires capturing the progress over time. Authorized users can access it through the main upper menu bar of the Reconeyez cloud. When a detector is assigned time-lapse mode, then it will stop triggering regular motion alarms and will take photos at pre-determined intervals. These photos taken over a longer period of time will be combined into a time-lapse video. Time-lapse feature is priced separately on per-device and per-month basis.
Who can access time-lapse?
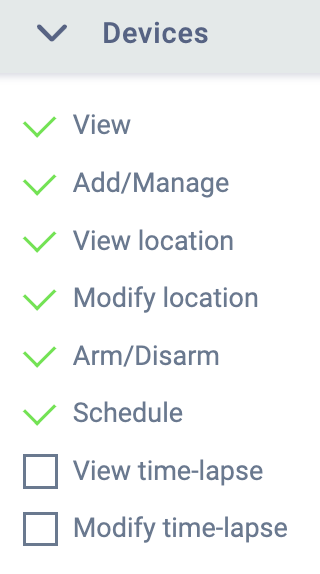
Time-lapse can be started, stopped or deleted by all Moderator and Owner level users. Also, time-lapse can be viewed by users with the default role View alarms & devices. Additionally, it is configurable for all custom-made roles by enabling View time-lapse and Modify time-lapse user rights. Time-lapse is not a user-specific right - any user who has Modify time-lapse access and access to the correct device(s) can stop a time-lapse started by another authorized user.
How it works technically?
A detector added to time-lapse mode will be in a disarmed state and not triggering to motion. Tamper alarms are
still enabled for security reasons, but will be ignored for the purpose of compiling the video. An ongoing time-lapse can either make only night photos or only day photos, not both at the same time. Once a time-lapse is started the day or night photo setting, or time-lapse type, cannot be modified. Only its name and 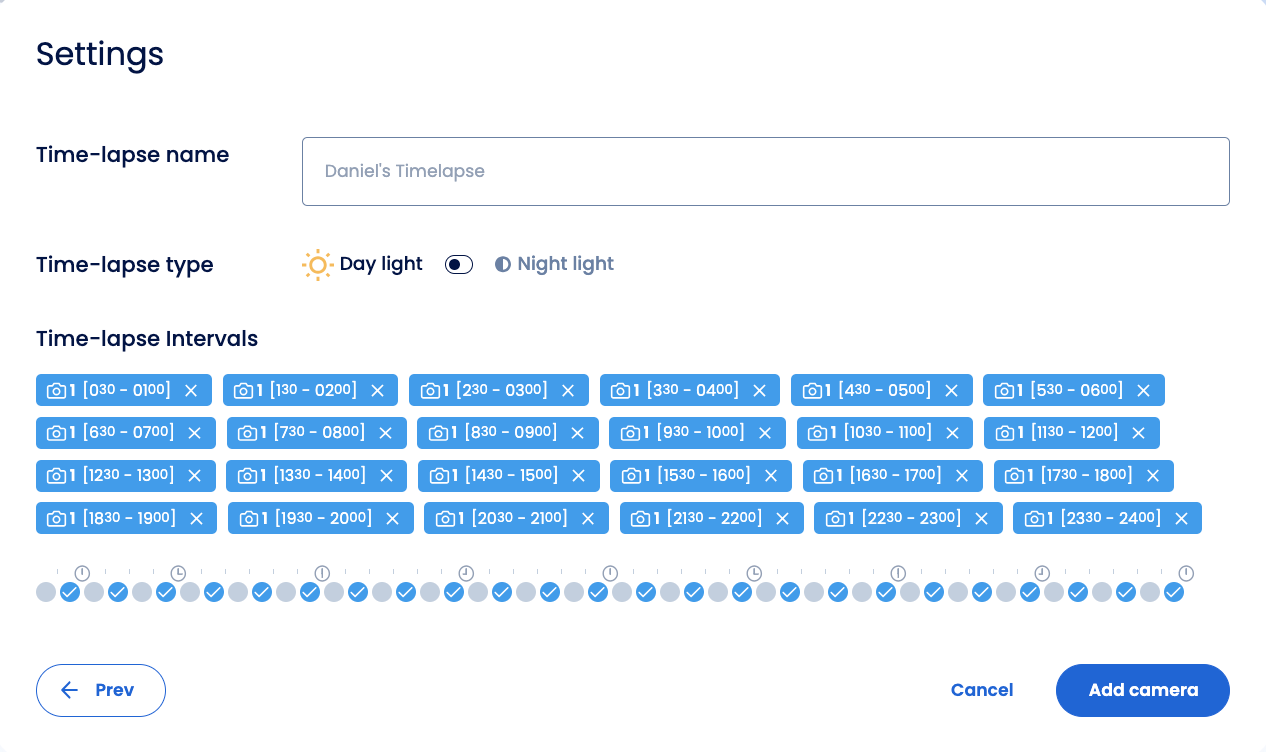
interval can be changed. The smallest time-lapse interval is 30 minutes. Time-lapse mode detectors cannot be used for guarding the site at the same time! One bridge can support both
security mode detectors (triggering on motion alarms) and time-lapse mode detectors (triggering at pre-determined intervals).
Getting started
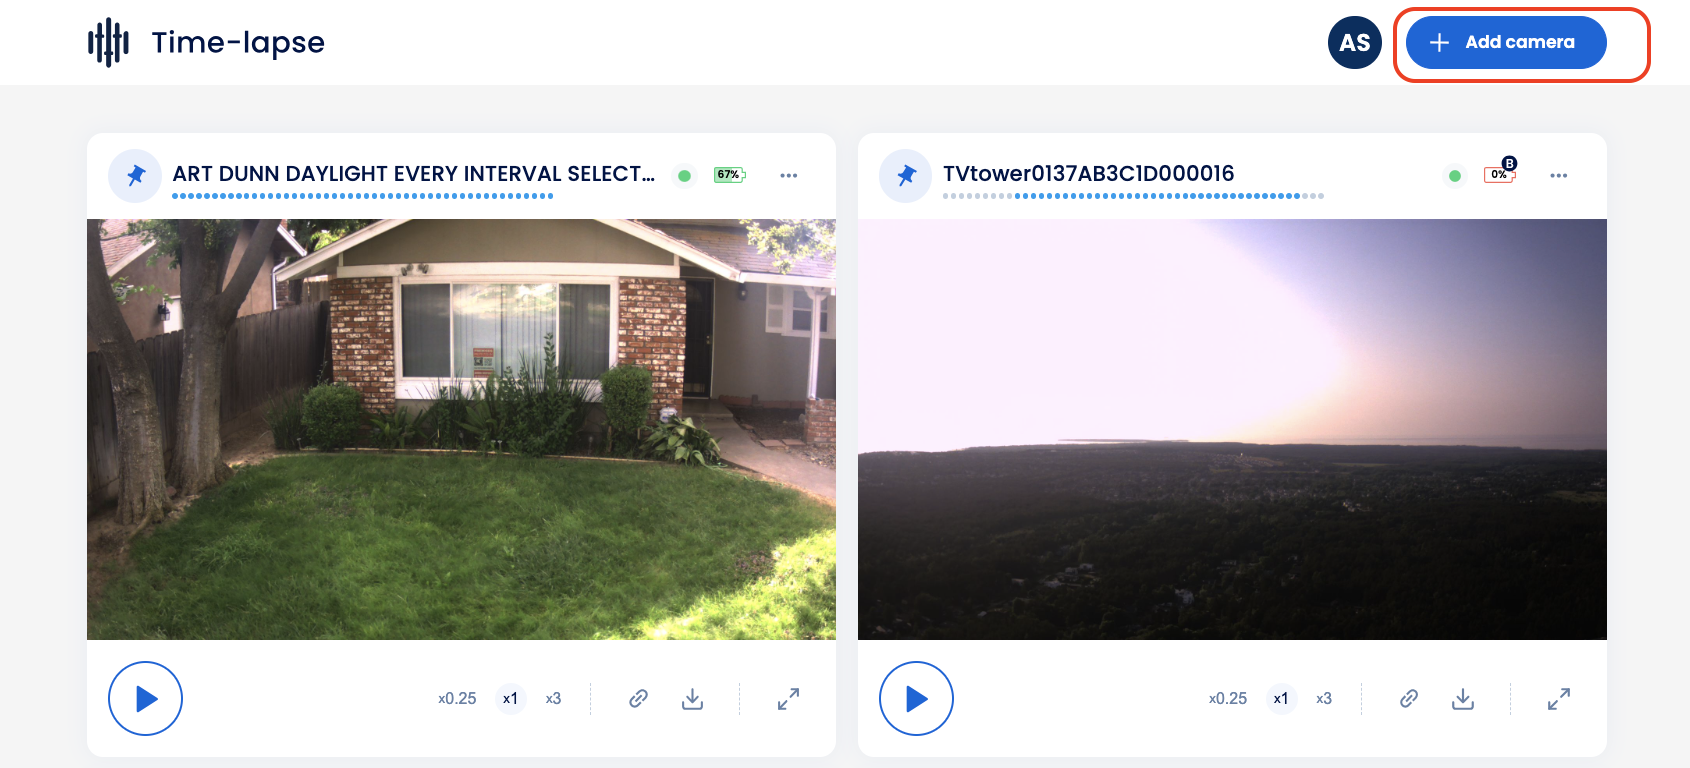
Click on the Time-lapse menu in the upper main menu bar of the Reconeyez cloud. The menu shows existing time-lapses that are in progress or stopped/paused. The upper right corner Add camera button allows to start a new time-lapse. First, choose the detector to be added to the chosen time-lapse. Then fill in time-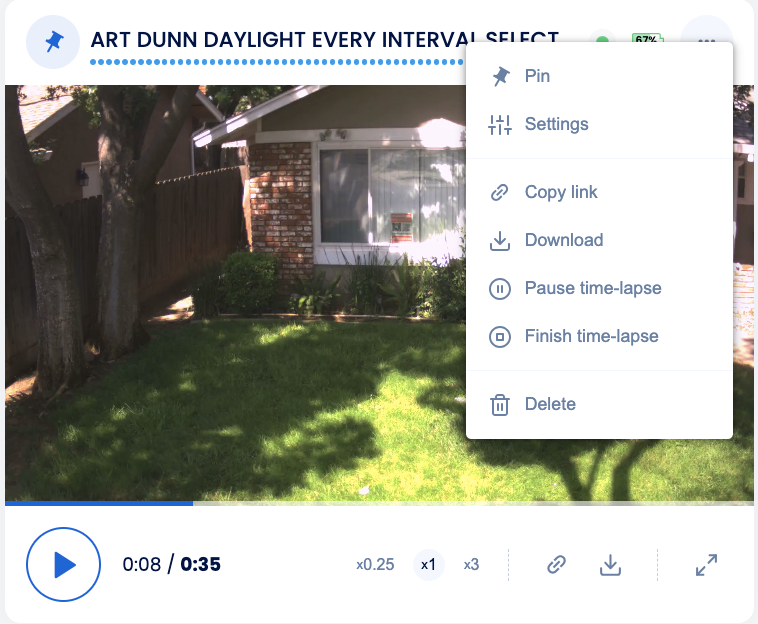
lapse name, type (day or night photos) and interval (30-1440 minutes) in the Settings sub-menu. Press Add camera to finish the setup.
Time-lapse settings
The drop-down menu of a started time-lapse allows to Pin the chosen time-lapse, to Copy link for sharing or Download the compiled video. Also it is possible to Pause, Finish or Delete the time-lapse. Please note that finishing and deleting time-lapses are irreversible.
The lower menu of the time-lapse allows to play or stop the compiled video, change video speed or toggle fullscreen video on/off. For convenience, there are shortcuts to Download and Copy link functions.