Solar charger components
Solar charger consists of 3 components:
1) Solar panel
2) Charging controller
3) Solar battery
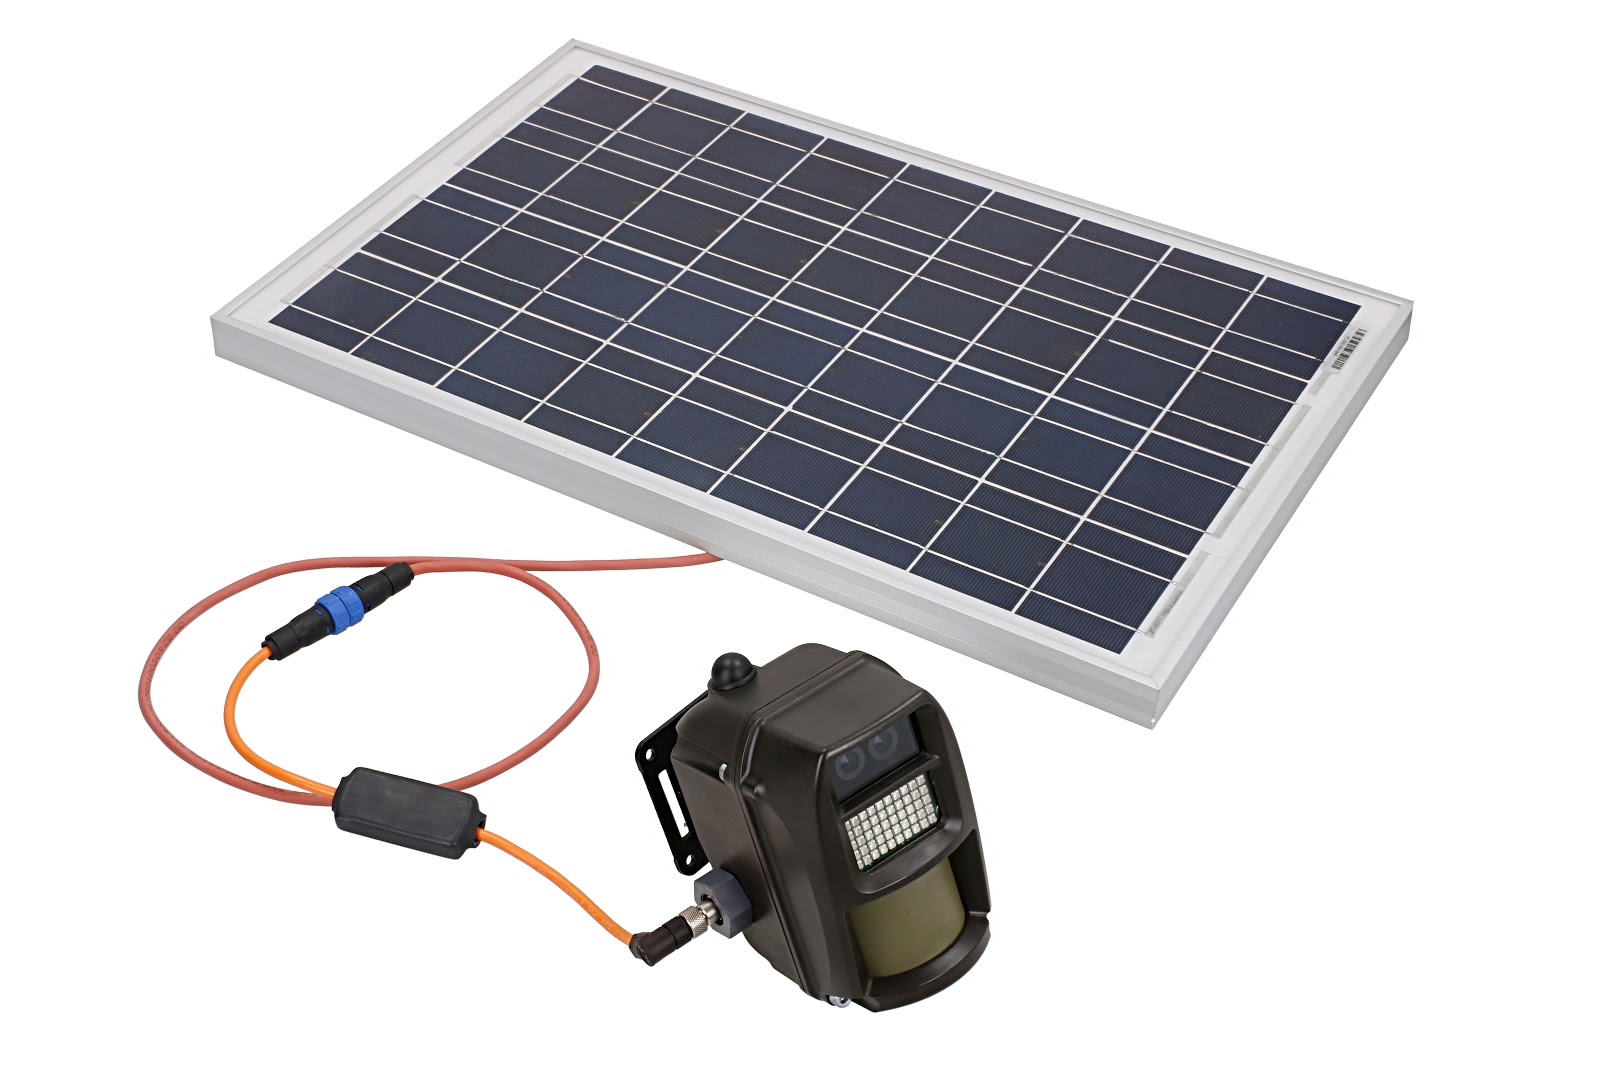
Solar panel has a permanently attached 2m cable with a waterproof connector at the end of it. Charging controller has 2 short cables with connectors. Controller is connected between solar panel and solar battery. Solar battery is similar to other Reconeyez batteries with the exception that it has an M8 charging socket. Solar charger can be added to any existing Reconeyez devices.
Installation

Solar charger can be installed in combination with any existing Reconeyez Detector or Bridge unit by replacing a regular battery with solar battery (with M8 socket) and connecting the Solar Panel cable to the battery. Solar panel can be mounted to any existing Reconeyez mounting hardware (bracket or screw) similar to other Reconeyez devices.
Never use solar battery without solar panel, charging connector is sealed only when mating connector is inserted and tightened.
It is recommended that the solar panel is mounted facing south (on the northern hemisphere) for maximum amount of solar radiation.
The recommended tilt angle of the solar panel for annual average can be determined by the location latitude using the following formula. Calculated angle is in relation to vertical placement: Tilt angle = 90°- latitude
For example in London (latitude approximately 51°) the recommended angle would be 90°- 51°= 39°
For the summer the above calculated angle can be increased by 15° and in the winter it can be reduced by 15°.
Example angles relative to vertical placement:
Summer angle in London 90° - 51° + 15° = 54°
Winter angle in London 90° - 51° - 15° = 24°