Please refer to the full Reconeyez installation training video for details: https://youtu.be/d3_7V7OJTv8
1. Reconeyez cloud user account
There are several preparations that need to be done before going to the installation site. First of which is ensuring that the installer has adequate user rights that allow them to log in to the app and the cloud to configure appropriate Reconeyez devices. Ask your Owner or Moderator user to create and configure your Reconeyez user account. After logging in, configure your local User timezone in user Preferences menu - in the upper right hand corner of main page. Video link: https://youtu.be/_gd98DZ3vt8?t=113
2. Grouping the devices 
Identify the devices that you wish to install by their serial number and ID number. Serial number is printed in device battery slot. ID numbers are the numbers appearing in Reconeyez cloud. Shipping documents include a list which allows to match the two numbers without an effort. Contact your distributor if this information is not included with the shipment. Before heading to installation site, please log into the Reconeyez cloud and create a new device area under Active folder in Devices menu. Group all the installed devices into this new device area. Make sure that all devices are grouped in the Active folder in the Reconeyez cloud - Inactive folder will not allow motion alarms to server, since it is meant for stock devices. Organised devices allow to execute installation quickly. Video link: https://youtu.be/_gd98DZ3vt8?t=766
3. Bridge configuration and connectivity test
Configuring and testing the bridge in advance is an excellent way to avoid issues on site. This consists of the following activities: 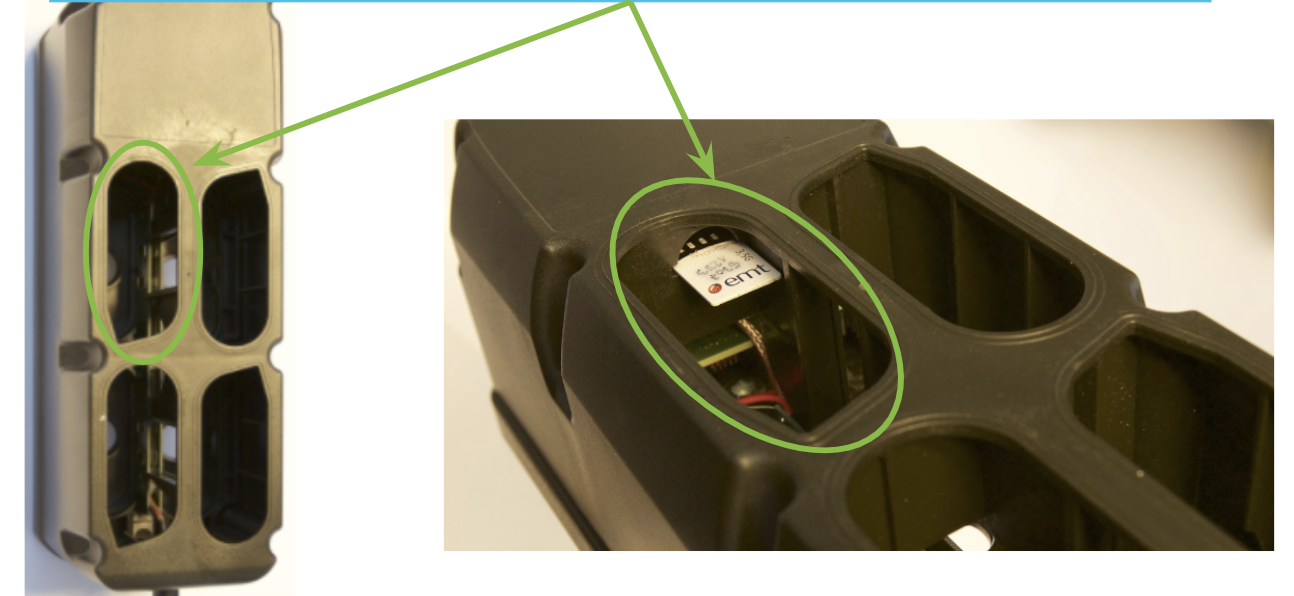
- Activate and test the SIM card - 1) remove PIN code request in a smartphone if needed, 2) find out SIM card APN (Access Point Name), 3) test SIM in smartdevice for connectivity (enable only Mobile data). Video link: https://youtu.be/_gd98DZ3vt8?t=182
- Test that you have correct security certificate loaded to your Reconeyez app in the Android smartdevice. In the Reconeyez app open App settings - App certificate - choose/load correct security certificate file. Test by opening any device’s Device configuration menu, which initiates a certificate exchange between device and the app. Video link: https://youtu.be/_gd98DZ3vt8?t=424

- Configure the Bridge unit - a) attach the antenna to the bridge, insert SIM card and batteries b) use Reconeyez app and connector mote to configure bridge: 1) Server address (eg. demo.reconeyez.com), 2) APN / APN user / APN password, and 3) Server port (default port is 9000) in the Bridge Device configuration menu. Video link: https://youtu.be/_gd98DZ3vt8?t=486
- Make a connectivity test with Bridge by: 1) making tamper alarms with the bridge (by shaking it) and 2) reloading Device configuration menu until Mobile RSSI parameter displays a signal (acceptable signal btw. -20 and -105 dBm). It may take up to 15 minutes for SIM to register in network for the first time. Do not proceed until the SIM card displays signal strength! In case of any issues with configuration or SIM card Mobile connection error parameter will display more precise information. Video link: https://youtu.be/_gd98DZ3vt8?t=487